Solar Powered Fake Camera Setup Guide: Install Your Own Security System
Solar-powered fake security cameras offer an eco-friendly, hassle-free way to boost outdoor security…….
Solar-powered fake security cameras offer an eco-friendly, hassle-free way to boost outdoor security with day-charging batteries and motion-activated recording. Assemble a setup by securing a high-quality fake camera (with adjustable mount and night vision), outdoor solar panel, rechargeable battery, and mounting hardware. Strategically place the camera at eye level in sunny areas for maximum surveillance impact. Regularly test alerts, monitoring, and footage for optimal performance of this cost-effective security solution.
Looking to enhance your home or business security without breaking the bank? Consider installing a solar-powered fake security camera. This eco-friendly option offers a simple, cost-effective solution for deterring potential intruders. In this guide, we’ll walk you through the process of setting up a solar-powered fake camera system, covering everything from understanding the technology to assembling and positioning your device for maximum impact. By the end, you’ll have a functional, realistic-looking security setup that leaves no room for doubt.
- Understanding Solar-Powered Fake Security Cameras
- Components and Tools Required for Installation
- Step-by-Step Guide to Setting Up Your Fake Camera System
Understanding Solar-Powered Fake Security Cameras
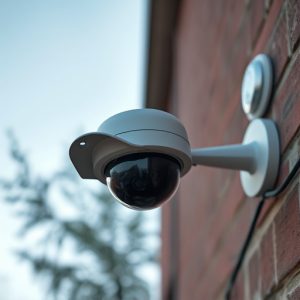
Solar-powered fake security cameras are an innovative and eco-friendly option for those looking to enhance their home or business’s security. Unlike traditional camera setups that rely on constant power supply, solar-powered cameras utilize renewable energy from the sun. This means they can be strategically placed outdoors without the need for complex wiring or a power outlet. The setup is straightforward; each camera includes a solar panel and a battery storage system, allowing it to capture high-resolution footage even in low-light conditions.
Understanding how these cameras work is essential for a successful Solar Powered Fake Camera Setup. The solar panels absorb sunlight during the day and charge the integrated batteries, ensuring they have enough power to operate at night. Some advanced models feature motion sensors that activate recording only when movement is detected, conserving energy and providing more realistic surveillance. By choosing the right placement and maintaining proper sun exposure, you can ensure optimal performance, making these fake security cameras a practical and visually appealing addition to any security system.
Components and Tools Required for Installation
To set up a convincing Solar Powered Fake Camera Setup, you’ll need several key components and tools. These include a high-quality fake security camera (opt for one with an adjustable mount for versatile placement), a solar panel designed for outdoor use, a rechargeable battery to power the camera and panel, and mounting hardware suitable for both the camera and panel. Additionally, gather basic tools like screwdrivers, wire strippers, and pliers to ensure a secure installation.
Remember to choose products rated for outdoor conditions to withstand varying weather. The solar panel should be positioned in an area that receives ample sunlight while strategically placing the camera where it offers optimal surveillance. With these essentials in hand, you’ll be ready to create an effective deterrent using your Solar Powered Fake Camera Setup.
Step-by-Step Guide to Setting Up Your Fake Camera System
Setting up a solar-powered fake security camera system is an easy and cost-effective way to enhance your home or business’s security. Here’s a step-by-step guide to help you get started:
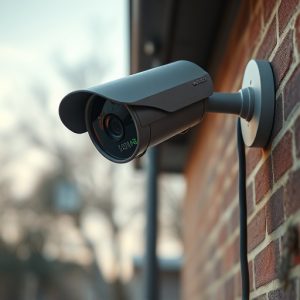
1. Select Your Solar-Powered Camera: Choose a high-quality, weatherproof solar camera designed for outdoor use. Ensure it has adjustable mounting options for optimal placement. Look for models with clear images and night vision capabilities for all-around surveillance.
2. Choose the Installation Location: Pick a sunny spot for optimal energy generation. Ideally, the camera should face unobstructed south (in the Northern Hemisphere) or north (in the Southern Hemisphere). Mount it at eye level or slightly elevated to ensure clear visibility and cover a broader area. Ensure it’s securely attached to a sturdy structure or pole using the provided hardware.
3. Install the Solar Panel: Position the solar panel in direct sunlight, facing the same direction as the camera. Use the mounting brackets to secure it firmly to the chosen surface. Ensure the panel is angled correctly for maximum sunlight absorption throughout the year.
4. Connect the Camera and Power It On: Link the solar panel to the camera using the included cables. Bury or trim back any vegetation blocking sunlight to the panel. Turn on the device, and let it charge under direct sunlight.
5. Configure Alerts and Monitoring: Set up email or app notifications for motion detection alerts. Test these settings by simulating movement in the surveillance area. Regularly monitor footage to ensure clear images and proper functionality.
A solar-powered fake security camera setup offers an efficient, eco-friendly alternative to traditional surveillance systems. By understanding the components and tools needed, you can easily install this cost-effective solution for enhancing home or business security. Following the step-by-step guide ensures a successful deployment, providing peace of mind and added protection without breaking the bank.