Solar-Powered Fake Camera Setup: Install Your Own Mock Surveillance System
A Solar Powered Fake Camera Setup offers a cost-effective, eco-friendly way to boost home or busines…….
A Solar Powered Fake Camera Setup offers a cost-effective, eco-friendly way to boost home or business security with visual deterrence. Combining realistic fake cameras, solar panels, and stored power, this system provides both aesthetic appeal and robust protection, accessible remotely via internet connection after strategic placement and configuration.
“Uncover the secrets of enhancing your home or business security with our comprehensive guide on installing a solar-powered fake camera system. This mock surveillance setup offers an innovative and cost-effective way to deter potential intruders without breaking the bank. In this article, we’ll walk you through the process step by step, from understanding the essential components to assembling the perfect Solar-Powered Fake Camera Setup. Get ready to transform your security measures with this eco-friendly and effective solution.”
- Understanding Solar-Powered Fake Camera Setup: A Mock Surveillance System
- Components and Tools Required for Installation
- Step-by-Step Guide to Deploying Your Solar-Powered Mock Surveillance System
Understanding Solar-Powered Fake Camera Setup: A Mock Surveillance System
A mock surveillance system, particularly using a solar-powered fake camera setup, is an innovative way to enhance security while maintaining an element of deception. These systems mimic real cameras, providing both visual deterrence and peace of mind, but without the costs and complexities associated with traditional surveillance infrastructure. The solar-powered aspect adds another layer of realism and sustainability, making it an eco-friendly option for homeowners and businesses alike.
By strategically placing these fake cameras around your property, you can effectively deter potential intruders while enjoying the added benefit of a secure environment. These devices are designed to withstand outdoor conditions, leveraging solar energy to power their functionality during daylight hours and drawing on stored energy when sunlight is unavailable. This setup offers not just an aesthetic representation of surveillance but also a practical solution for those seeking to bolster their security measures without breaking the bank.
Components and Tools Required for Installation
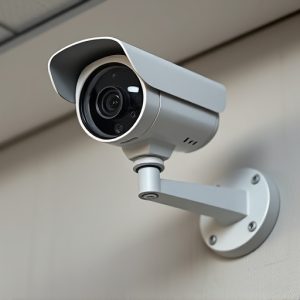
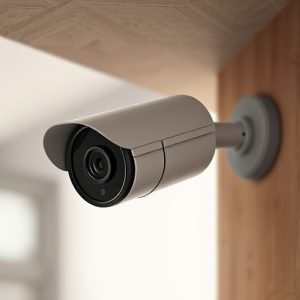
To set up a Solar-Powered Fake Camera Setup, you’ll need several key components and tools to ensure an effective mock surveillance system. Begin with high-quality solar panels designed for outdoor use, as they will capture sunlight and convert it into power for the connected devices. A durable and realistic fake camera is essential; look for one that mimics real security cameras accurately. This will act as the central component of your setup. Additionally, a rechargeable battery or energy storage system is required to store excess solar energy collected during daylight hours for use at night or on cloudy days.
Complementing these core elements are various tools such as mounting hardware suitable for both solar panels and fake cameras, ensuring they can be securely attached to poles or walls. You’ll also need a power inverter to convert the direct current (DC) electricity from solar panels into alternating current (AC) for powering devices in your home or office. A good set of wire connectors and cables will facilitate the safe and efficient transmission of electrical signals between components. These tools and parts collectively enable the creation of a compelling Solar-Powered Fake Camera Setup, providing both aesthetic realism and genuine security measures.
Step-by-Step Guide to Deploying Your Solar-Powered Mock Surveillance System
Deploying a solar-powered fake camera setup is an effective and eco-friendly way to enhance security while adding a layer of deception. Here’s a step-by-step guide to ensure a successful installation:
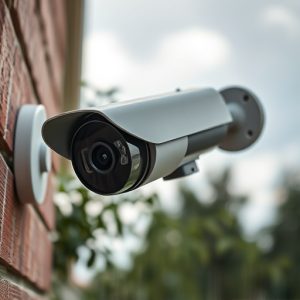
1. Choose Your Location: Select a strategic spot for your Solar Powered Fake Camera Setup, considering factors like visibility, sunlight exposure, and proximity to areas you wish to monitor. Ensure it’s legal and ethical to install the device in that location.
2. Unbox and Assemble: Carefully unpackage your solar-powered camera system. Most kits come with easy-to-follow instructions for assembly. Attach the solar panel to a stable surface like a wall or roof, ensuring it faces directly towards the sun. Securely mount the camera nearby, aligning its field of view to capture the intended area.
3. Configure Settings: Adjust the camera’s settings according to your preferences. This may include adjusting sensitivity, motion detection zones, and recording parameters. Ensure the system is configured to activate only when movement is detected, preserving battery life and storage capacity.
4. Test and Calibrate: After installation, thoroughly test the system by simulating movement in the monitored area. Adjust the camera’s focal point or sensitivity if needed for optimal performance.
5. Power On and Connect: Ensure the solar panel is generating power, and activate the device. Connect it to your preferred storage solution or monitoring platform using a stable internet connection, allowing you to review footage remotely as required.
Creating a mock surveillance system with solar-powered fake cameras not only enhances security but also serves as an effective deterrent. By following this step-by-step guide, you’ve now equipped yourself with the knowledge to install and deploy your own system. Remember, while this setup offers a realistic simulation, it’s crucial to balance the benefits with ethical considerations regarding privacy. With proper placement and maintenance, your solar-powered fake camera setup will provide peace of mind, ensuring your property remains secure and well-monitored.