Solar-powered fake camera setups offer a cost-effective and eco-friendly security solution for homes and businesses, harnessing sunlight to power cameras and sensors with minimal maintenance. The distinctive red blinking light serves as both a deterrent and operational indicator. Installation involves selecting a sunny location, mounting the solar panel and camera housing, connecting components, and activating the light remotely or manually. Regular cleaning and maintenance are crucial for optimal performance in varying weather conditions. These systems are popular due to their discreet appearance, low-maintenance nature, and psychological impact on potential intruders, making them an effective deterrent for residential and commercial properties.
“Uncover the power of solar-powered dummy camera setups, a sophisticated yet affordable security solution. This comprehensive guide explores the intricate world of red blinking light systems, offering insights into their components and installation process. From understanding the technology behind these ‘fake’ cameras to identifying benefits and troubleshooting common issues, we provide a step-by-step approach. Whether you’re enhancing home security or managing commercial premises, this article is your go-to resource for harnessing the potential of Solar Powered Fake Camera Setup.”
- Understanding Solar-Powered Dummy Camera Setups
- Components of a Red Blinking Light System
- Installation Process: Step-by-Step Guide
- Benefits and Applications of This Security Measure
- Troubleshooting Common Issues with Fake Camera Systems
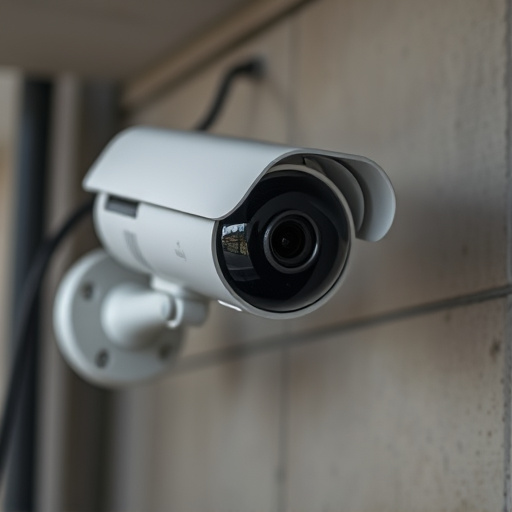
Understanding Solar-Powered Dummy Camera Setups
Solar-powered dummy camera setups have gained popularity among homeowners and business owners alike as a cost-effective and eco-friendly security solution. These setups, often referred to as Solar Powered Fake Camera Setup, leverage renewable energy from the sun to power both the camera and its associated sensors. By eliminating the need for traditional wiring and electrical connections, these cameras offer increased flexibility in installation, allowing them to be placed virtually anywhere with access to sunlight.
The key advantage lies in their passive nature; once installed and charged by solar panels, they require minimal maintenance. The red blinking light, a distinctive feature often associated with dummy cameras, serves as a deterrent to potential intruders while also indicating the camera’s operational status. This innovative technology combines form and function, providing enhanced security without the hassle of complex wiring or ongoing electricity costs.
Components of a Red Blinking Light System
A Solar Powered Fake Camera Setup, with its red blinking light, is a sophisticated security solution designed to deter potential intruders. The system typically comprises several key components working in harmony. At the heart of this setup is a solar panel, which harnesses energy from sunlight during the day and stores it in a rechargeable battery. This ensures the camera operates independently without any need for power outlets or wires, making it ideal for outdoor installations.
The solar-powered dummy camera itself features a realistic design, complete with lenses and a housing that mimics genuine surveillance equipment. Integrated into this setup is a motion sensor that detects movement within its range. When triggered, the motion sensor activates the red blinking light, which serves as a stark visual warning to any would-be intruders. This clever combination of solar energy, advanced technology, and realistic mimicry creates an effective deterrent for enhancing home or business security.
Installation Process: Step-by-Step Guide
Installation Process: Step-by-Step Guide
To install a solar-powered dummy camera red blinking light setup, begin by selecting an ideal location—a spot with ample sunlight access to ensure optimal energy generation. Next, unpack your Solar Powered Fake Camera Setup, which typically includes the camera housing, solar panel, and flashing light unit. Mount the solar panel on a roof or wall, ensuring it faces the sun directly for maximum exposure. Then, securely attach the camera housing, aiming it towards areas you wish to monitor. Connect the solar panel to the camera using provided cables, ensuring a proper power supply. Activate the blinking light feature—this can be done remotely via an app (if equipped) or by manually switching it on when needed. Regularly clean and maintain the setup to ensure optimal performance and longevity in various weather conditions.
Benefits and Applications of This Security Measure
The Solar Powered Fake Camera Setup offers a multitude of benefits as a security measure, proving to be an effective deterrent for potential intruders. One of its key advantages is the absence of constant power consumption; this eco-friendly design relies on solar energy, ensuring a sustainable and cost-effective solution. The blinking red light, powered by sunlight, creates a powerful visual signal, indicating that the area is under surveillance, without requiring any connection to the electrical grid.
This innovative setup has diverse applications, from residential properties to commercial buildings. It can be strategically placed in hard-to-reach areas, such as rooftops or gardens, providing an extra layer of protection. The dummy camera’s design also serves as a psychological barrier, encouraging potential thieves or vandals to reconsider their actions due to the perceived heightened security. With its discreet yet powerful presence, this technology offers peace of mind and enhanced safety without compromising aesthetics.
Troubleshooting Common Issues with Fake Camera Systems
Fake camera systems, often powered by solar energy, are a popular choice for deterring intruders due to their discreet nature and low maintenance. However, like any technology, they can encounter issues. One common problem is the red blinking light, which indicates an error or malfunction. This could be due to various factors; first, check if the solar panel is receiving adequate sunlight, as this powers the camera and its accessories. Ensure it’s not shaded by trees or buildings during daylight hours.
Another potential issue is a faulty battery or charging system. Regularly inspect the batteries for corrosion or damage and replace them if necessary. Verify that the charger is functioning correctly and properly connected to both the solar panel and the camera. Troubleshooting these basic problems can often resolve the red blinking light, ensuring your Solar Powered Fake Camera Setup operates smoothly and effectively as a deterrent.
The solar-powered dummy camera with its distinctive red blinking light offers a cost-effective and eco-friendly security solution for homes and businesses. By understanding the key components, installation process, and benefits outlined in this guide, you can effectively integrate this sophisticated yet simple device into your surveillance system. Remember that proper placement and regular maintenance are crucial to ensure optimal performance and deter potential intruders, making it a valuable investment in personal or commercial security.